安信可诚意满满,开发者福利享不停!
安信可最近的活动真是层出不穷,送开发板、送模组的福利一波接一波,力度之大让人应接不暇。
每次活动都诚意满满,吸引了大量开发者参与,简直让人挑花了眼。无论是新手还是资深开发者,都能从中找到适合自己的机会。不过,活动频率和力度确实有点让人“接不过来”,感觉稍不留神就会错过一波福利。安信可的这种慷慨举措,不仅让大家感受到了品牌的诚意,也进一步推动了开发者生态的繁荣。
BW21-CBV AI活动地址
免费申请 |小安派 BW21-CBV AI图像识别开发板50套,直接送!(活动已停)
https://bbs.ai-thinker.com/forum.php?mod=viewthread&tid=45783&_dsign=9edcdb85
申请成功名单
小安派 BW21-CBV AI图像识别开发板申请成功名单通知
https://bbs.ai-thinker.com/forum.php?mod=viewthread&tid=45829
万事俱备,只欠开发板!环境搭建教程已就绪,坐等开箱!
小安派BW21-CBV-Kit介绍
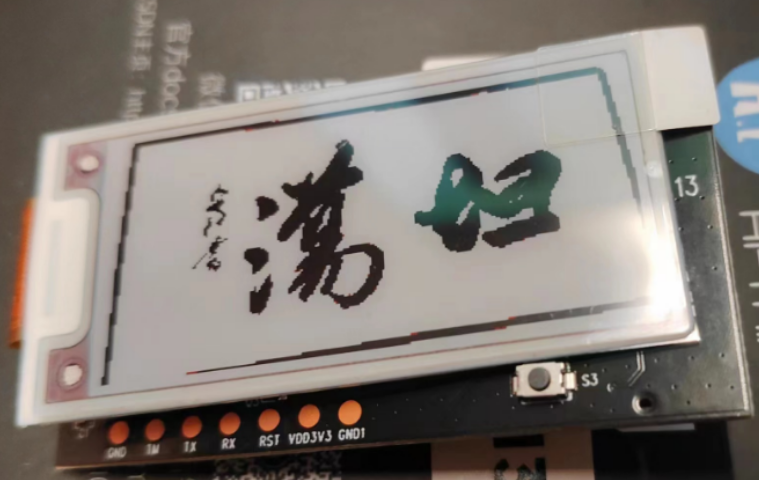
BW21-CBV-Kit 是一款本地AI图象识别开发板,它能够独自运行目标识别模型。
2.4GHz+5GHz的双频WiFi,提供高性能的无线传输能力,让图象传输更加流畅。
Arduino的开发方式,你可以很简单的实现自己的想法,例如:人脸识别、手势识别、物品识别等大量AI识别例程,总有一个适合你。丰富的接口,搭配着AI识别,可以扩展出无限可能。

BW21-CBV Arduino 开发教程
https://fcniufr8ibx1.feishu.cn/wiki/YUwbwPSTmiGsomkicyOcno2pnni?fromScene=spaceOverview
BW21-CBV-Kit 是深圳市安信可科技有限公司基于 RTL8735B 系列芯片开发的双频Wi-Fi + BLE 摄像头 SoC 模组开发板,支持双频(2.4 GHz 或 5 GHz)802.11a/b/g/n WLAN协议和 BLE 5.1 协议。
BW21-CBV-Kit 集成了 ARM v8M MCU(500MHz 和2.23 DMIPS/MHz)、WLAN MAC、支持 1T1R 的 WLAN 基带、蓝牙MAC、RF、音频编解码器、ISP 和 H264/H265 编码器。
BW21-CBV-Kit 模组开发板具有丰富的外设接口,包括 UART/GPIO/ADC/PWM/IIC/IIS/ SPI/SDIO/SWD/EPHY/Audio/MIC/MIPI/USB 等。
可广泛应用于物联网(IoT)、智能音视频设备、智能家居等领域。
支持 802.11a/b/g/n 协议
支持 802.11e QoS 增强(WMM)
支持双频 2.4GHz 或 5GHz
支持 HT20/HT40 模式
支持 BLE 5.1 协议
支持 LE 安全连接
支持 LE 散射网
支持 LE 1 个主/1 个从
支持 LE 数据长度扩展
支持链路层隐私
支持硬件加密引擎
Real-M500(TM9)时钟频率高达 500MHz
2 组 1x18 排针,引出 30 个可编程 IO
提供 TF 卡座
支持 12 位拜耳模式输入和 8 位 CMOS 传感器的 YUY2 输入
支持 MIPI CSI-2 四数据通道
提供 MIPI 摄像头接口
支持 MCM 嵌入式 64MB/128MB DDR2 内存
支持短距离低功耗 Tx/Rx 应用
Wi-Fi 和蓝牙共用同一天线
支持 Arduino 开发
GPIO引脚定义

接口指示说明


Arduino IDE 下载
下载地址
这里从github下载
https://github.com/arduino/arduino-ide

选择Release或者2.3.4标签
下载页面

向下拉找到自己电脑对应的安装文件,下载即可。这里推荐使用迅雷等下载器下载,速度会快一些。

Arduino IDE 安装
下载完成后找到安装文件

双击打开,进行安装

这里是协议条款,条款内容如下
Terms of Service
服务条款
The Arduino software is provided to you "as is" and we make no express or implied warranties whatsoever with respect to its functionality, operability, or use, including, without limitation, any implied warranties of merchantability, fitness for a particular purpose, or infringement. We expressly disclaim any liability whatsoever for any direct, indirect, consequential, incidental or special damages, including, without limitation, lost revenues, lost profits, losses resulting from business interruption or loss of data, regardless of the form of action or legal theory under which the liability may be asserted, even if advised of the possibility or likelihood of such damages.
Arduino软件按“原样”提供给您,我们对其功能、可操作性或使用不作任何明示或暗示的保证,包括但不限于对适销性、特定用途适用性或侵权的任何暗示保证。我们明确表示,对于任何直接、间接、后果性、附带或特殊损害,包括但不限于收入损失、利润损失、业务中断或数据丢失造成的损失,我们不承担任何责任,无论主张责任的诉讼形式或法律理论如何,即使被告知此类损害的可能性或可能性。
用翻译软件翻译了一下,感兴趣的可以看下。一般这里常规操作就是“我同意”

然后是安装选项,这里包含两个选项。
如果有多个账号可以使用当前电脑并且想给所有用户都安装Arduino IDE的话,就选第一个。
“为使用这台电脑的任何人安装(所有用户)”
如果电脑只有一个管理员账号或者只想自己当前账号使用Arduino IDE的话就选第二个。
“仅为我安装(Administrator)”
这里下面还有一个提示信息,“已经存在一个安装到当前用户的安装.(F:\Arduino)即将重新安装/升级”,是因为我这里原来安装过Arduino IDE,有一些IDE的缓存和注册表被检测到了所以有这个提示。这里为了丰富文章,所以重新安装IDE。点击下一步。

选择安装位置。这里建议尽量把软件或者IDE安装到C盘以外的盘符下面。因为目前大部分开发软件都会把缓存存放在C盘中,导致C盘存储空间莫名的就不够用了。还不知道删什么东西,如果乱删的话可能导致软件配置信息丢失。
下面提示信息是Arduino IDE 所需存储空间是500.1MB,当前盘可用空间是66.9GB完全够用了。这个500.1MB仅仅是软件安装程序的大小。一旦开发环境搭建好各种依赖类库拉下来缓存会非常大。不过不是在安装目录。一般都是在C盘。
点击安装

开始跑进度了

安装完成,点击完成按钮即可运行 Arduino IDE了。如果取消“运行Arduino IDE(R)”前面的复选框勾选,点击完成就不会运行Arduino IDE了。
Arduino IDE 配置
Arduino IDE安装完成后,点击完成按钮默认会启动IDE,或者到桌面上找到启动图标

启动Arduino IDE,开发工具UI如下图

附加开发板URL配置
在 Arduino IDE 中正确设置,请转到 "文件"->"首选项"。

其他开发板管理器地址,点击后面的图标可以查看详细

换行后将如下内容粘贴到文本框中
https://ameba-doc-arduino-sdk-json.readthedocs-hosted.com/en/latest/_static/package_realtek_amebapro2_early_index_rtd.json
然后点击确定按钮

这时其他开发板管理器地址文本框内会有一部分显示出来。再次点击确定。

会自动下载其他开发板管理器相关文件,这里时间受网络影响可能比较慢,也可能10来秒就好了。等就可以了。
安装开发板管理器
点击左侧开发板管理器图标或者进入 "工具"->"开发板"->"开发板管理器":

进入开发板管理器页面

然后搜索“Realtek Ameba Boards”

点击安装

网络状态好的话很快就安装完成了。这里会输出下载和安装安装包的一些日志。
完整安装日志
Downloading packages
realtek:ameba_pro2_toolchain@1.0.1-p1
realtek:ameba_pro2_toolchain2@1.0.1-p2
realtek:ameba_pro2_tools@1.4.1
realtek:ameba_pro2_nn_models@1.0.2
realtek:AmebaPro2@4.0.9-build20250205
Installing realtek:ameba_pro2_toolchain@1.0.1-p1
Configuring tool.
realtek:ameba_pro2_toolchain@1.0.1-p1 installed
Installing realtek:ameba_pro2_toolchain2@1.0.1-p2
Configuring tool.
realtek:ameba_pro2_toolchain2@1.0.1-p2 installed
Installing realtek:ameba_pro2_tools@1.4.1
Configuring tool.
realtek:ameba_pro2_tools@1.4.1 installed
Installing realtek:ameba_pro2_nn_models@1.0.2
Configuring tool.
realtek:ameba_pro2_nn_models@1.0.2 installed
Installing platform realtek:AmebaPro2@4.0.9-build20250205
Configuring platform.
Platform realtek:AmebaPro2@4.0.9-build20250205 installed
并且这里“安装”变成了“移除”

我们在 "工具"->"开发板"->"AmebaPro2 ARM (32 位) 电路板"->"AMB82-MINI "中选择开发板。

示例代码在"文件"->"示例"->"AMB82MINI 的示例"

这里打开一个人脸识别的示例

/*

 Example guide:
 https://www.amebaiot.com/en/amebapro2-arduino-neuralnework-face-detection/

 NN Model Selection
 Select Neural Network(NN) task and models using modelSelect(nntask, objdetmodel, facedetmodel, facerecogmodel).
 Replace with NA_MODEL if they are not necessary for your selected NN Task.

 NN task
 =======
 OBJECT_DETECTION/ FACE_DETECTION/ FACE_RECOGNITION

 Models
 =======
 YOLOv3 model         DEFAULT_YOLOV3TINY   / CUSTOMIZED_YOLOV3TINY
 YOLOv4 model         DEFAULT_YOLOV4TINY   / CUSTOMIZED_YOLOV4TINY
 YOLOv7 model         DEFAULT_YOLOV7TINY   / CUSTOMIZED_YOLOV7TINY
 SCRFD model          DEFAULT_SCRFD        / CUSTOMIZED_SCRFD
 MobileFaceNet model  DEFAULT_MOBILEFACENET/ CUSTOMIZED_MOBILEFACENET
 No model             NA_MODEL
 */

#include "WiFi.h"
#include "StreamIO.h"
#include "VideoStream.h"
#include "RTSP.h"
#include "NNFaceDetection.h"
#include "VideoStreamOverlay.h"

#define CHANNEL   0
#define CHANNELNN 3

// Lower resolution for NN processing
#define NNWIDTH  576
#define NNHEIGHT 320

VideoSetting config(VIDEO_FHD, 30, VIDEO_H264, 0);
VideoSetting configNN(NNWIDTH, NNHEIGHT, 10, VIDEO_RGB, 0);
NNFaceDetection facedet;
RTSP rtsp;
StreamIO videoStreamer(1, 1);
StreamIO videoStreamerNN(1, 1);

char ssid[] = "Network_SSID";    // your network SSID (name)
char pass[] = "Password";        // your network password
int status = WL_IDLE_STATUS;

IPAddress ip;
int rtsp_portnum;

void setup()
{
    Serial.begin(115200);

    // attempt to connect to Wifi network:
    while (status != WL_CONNECTED) {
        Serial.print("Attempting to connect to WPA SSID: ");
        Serial.println(ssid);
        status = WiFi.begin(ssid, pass);

        // wait 2 seconds for connection:
        delay(2000);
    }
    ip = WiFi.localIP();

    // Configure camera video channels with video format information
    // Adjust the bitrate based on your WiFi network quality
    config.setBitrate(2 * 1024 * 1024);    // Recommend to use 2Mbps for RTSP streaming to prevent network congestion
    Camera.configVideoChannel(CHANNEL, config);
    Camera.configVideoChannel(CHANNELNN, configNN);
    Camera.videoInit();

    // Configure RTSP with corresponding video format information
    rtsp.configVideo(config);
    rtsp.begin();
    rtsp_portnum = rtsp.getPort();

    // Configure face detection with corresponding video format information
    // Select Neural Network(NN) task and models
    facedet.configVideo(configNN);
    facedet.setResultCallback(FDPostProcess);
    facedet.modelSelect(FACE_DETECTION, NA_MODEL, DEFAULT_SCRFD, NA_MODEL);
    facedet.begin();

    // Configure StreamIO object to stream data from video channel to RTSP
    videoStreamer.registerInput(Camera.getStream(CHANNEL));
    videoStreamer.registerOutput(rtsp);
    if (videoStreamer.begin() != 0) {
        Serial.println("StreamIO link start failed");
    }

    // Start data stream from video channel
    Camera.channelBegin(CHANNEL);

    // Configure StreamIO object to stream data from RGB video channel to face detection
    videoStreamerNN.registerInput(Camera.getStream(CHANNELNN));
    videoStreamerNN.setStackSize();
    videoStreamerNN.setTaskPriority();
    videoStreamerNN.registerOutput(facedet);
    if (videoStreamerNN.begin() != 0) {
        Serial.println("StreamIO link start failed");
    }

    // Start video channel for NN
    Camera.channelBegin(CHANNELNN);

    // Start OSD drawing on RTSP video channel
    OSD.configVideo(CHANNEL, config);
    OSD.begin();
}

void loop()
{
    // Do nothing
}

// User callback function for post processing of face detection results
void FDPostProcess(std::vector<FaceDetectionResult> results)
{
    int count = 0;

    uint16_t im_h = config.height();
    uint16_t im_w = config.width();

    Serial.print("Network URL for RTSP Streaming: ");
    Serial.print("rtsp://");
    Serial.print(ip);
    Serial.print(":");
    Serial.println(rtsp_portnum);
    Serial.println(" ");

    printf("Total number of faces detected = %d\r\n", facedet.getResultCount());
    OSD.createBitmap(CHANNEL);

    if (facedet.getResultCount() > 0) {
        for (int i = 0; i < facedet.getResultCount(); i++) {
            FaceDetectionResult item = results[i];
            // Result coordinates are floats ranging from 0.00 to 1.00
            // Multiply with RTSP resolution to get coordinates in pixels
            int xmin = (int)(item.xMin() * im_w);
            int xmax = (int)(item.xMax() * im_w);
            int ymin = (int)(item.yMin() * im_h);
            int ymax = (int)(item.yMax() * im_h);

            // Draw boundary box
            printf("Face %ld confidence %d:\t%d %d %d %d\n\r", i, item.score(), xmin, xmax, ymin, ymax);
            OSD.drawRect(CHANNEL, xmin, ymin, xmax, ymax, 3, OSD_COLOR_WHITE);

            // Print identification text above boundary box
            char text_str[40];
            snprintf(text_str, sizeof(text_str), "%s %d", item.name(), item.score());
            OSD.drawText(CHANNEL, xmin, ymin - OSD.getTextHeight(CHANNEL), text_str, OSD_COLOR_CYAN);

            // Draw facial feature points
            for (int j = 0; j < 5; j++) {
                int x = (int)(item.xFeature(j) * im_w);
                int y = (int)(item.yFeature(j) * im_h);
                OSD.drawPoint(CHANNEL, x, y, 8, OSD_COLOR_RED);
                count++;
                if (count == MAX_FACE_DET) {
                    goto OSDUpdate;
                }
            }
        }
    }

OSDUpdate:
    OSD.update(CHANNEL);
}
到这里环境就搭建完了。下一步就是烧录看效果了。


 笨鸟先飞撒
笨鸟先飞撒